I vividly remember how I worked day and night to prepare my college’s final year project report it was completely maddening from understanding the format to presentation style to sequencing of the paras and countless proofreading edits it was a pain staking task! What is next in line after table of contents, where should I line up the summary and what after that? Countless questions and a confused mind that’s what it feels while preparing a college project report. However, with a couple of redo’s and a lot of experimentation, I was surprised to find out that MS Word actually has certain features that could help student’s draft a perfect college project report.
So, boys and girls irrespective of whatever field you are specializing in or be it whichever kind of project you working on from,Taxation to Marketing to Advertising or Banking & Insurance this article will give you a brief understanding on what exactly should go into your college report draft and how you can use certain features in MS Word to create a report without getting all stressed out.
But first, let’s take a sneak peek into the format of a college project report. You know, the biggest challenge I as a student faced was to categorize the document content in a proper format. I remember we would endlessly browse the Internet via our laptops or desktops and even smartphones to find the basic format.I am sure many students out there face the same dilemma. So, here’s what the basic format of a college project report looks like.
Get Your Basic’s right.
Generally, the basic outline of any report consist of the following:
- Cover or Title Page
- Table of Contents
- Certification
- Summary
- Introduction
- Body
- Conclusion
- Recommendation
- Bibliography
1)Cover Page or Title Page:
A cover page is all about making a first impression. This first page of your report gives the reader a gist about what the document is all about. That being said, generally due to this students tend to invest a lot of time in creating an impressive cover page. However, MS Word offers you some time-saving 16 pre-formatted cover page options to choose from that will definitely make your document stand out from the rest. You can follow the below procedure to quickly insert a cover page.
Step 1: Open the Word document and click on the Insert menu on the Ribbon Tab.
Step 2: You’ll find the Cover Page Option under Pages. Select any of your preferred pre-formatted cover page option from the dropdown menu.
Step 3: As you click on your preferred pre-formatted cover page option, it will automatically appear at the beginning of the document.
2) Table of Contents:
Table of content is an essential and important part of your project report that’s because mainly, the table of content gives the reader a glimpse of the topics covered under your project report. That being said, let’s take a look at how with the help of MS Word you can apply some amazing built-in Table of Content designs.
Step 1: Firstly, place the cursor where you wish to insert the table of content in the document.
(If you’d like it to appear on its own page, insert a page break before and after inserting the Table of Contents).
Step 2: To click on the Reference Tab –> Click on the Table of Contents Option under the Table of Content group –> a dropdown with Built-in Table of contents style will appear.

Step 3: You can choose the style of Table of Contents you wish to insert from the dropdown list.
Furthermore, you can modify the Table of Content by;
Step a: Click on the ‘Custom Table of Content’ feature under Table of Contents Option.
Step b: A Table of Content dialogue box will appear –> Click on the Options to change the heading style in the Table of Content –> A table of Content Option dialogue box will appear –> Click on OK after making the required changes.
If you want to make any changes in the font size, numbering etc. you need to;
Step c: Click on Modify –> a style dialogue box will appear –> you can preview the style and select the appropriate style for your Table of Contents –> After making the necessary changes click on OK.


3) Header & Footer
The header of the document normally contains the title of the section or topic whereas, the footer includes the page number and date of publication. If you want to give a unique look to your document with a header and footer then here’s what you should do;
Step 1: To insert the header or footer in your document click on the Insert Tab –>Click on the Header or Footer option under the Header & Footer group.
Step 2: Click on the drop-down arrow under header –> you will find a couple of Built-in options listed under the dropdown –> select your preferred choice of Header for your document.
(You can apply the same procedure to add a footer to your document)
Step 3: Once selected you can click on Close Header and Footer option.
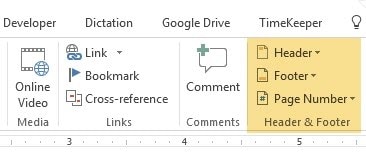


4) Add Page Numbers
Numbering a page would not only give a systematic look to your report but is time saving as it make it easy for the reader to access the information (for instance; Research Methodology- page 12, so the reader knows that if he or she wants to read the information on Research methodology then the reader can directly jump to page no 12) There are two methods in which you can insert page numbers in the document:
Method 1:
Step 1: To insert Page Number you need to click on the Insert Tab –> click on the Page Number option under Header & Footer group.
Step 2: You will find built-in options under Top of Page, Bottom of the Page, Page Margin and Current Position as you place the cursor over these four categories.

Method 2:
Step 1: Another way to insert page numbers in your document is by clicking on Insert Tab –> then clicking on Quick Parts Option –> Select the field option under the drop down list.
Step 2: A field dialogue box will appear –> select the NumPages under the categories list
Step 3: You can view and select the required number format displayed under field properties
Step 4: Click on OK after selection.
5) Insert Watermarks
Watermarks are often used to indicate the type of document. For e.g. it could be a simple draft or copyrighted document or a confidential document. Here’s how you can insert watermarks in your report (if required)
Step 1. You need to click on the Design Tab –> Click on the Watermark Option under Page Background group –>a dropdown box with four types of watermark will appear.

You can add customized watermark (picture or text) from the gallery by:
Step a: Clicking on the Custom Watermark option
Step b: A dialogue box with a default selection of No watermark will appear.
Step c: Select the Picture watermark option to insert a watermark of an image –> you can click on the select picture option to browse the images saved in your laptop or desktop.
Step d: However, if you wish to insert a text as watermark–>Click on the Text watermark option–> you can then customize the font, language, size, color and position (diagonal or horizontal) of your text.
Step 2: Once finalized, click on OK to apply the watermark –> Apart from the Title Page, the selected watermark will automatically get applied on the pages in the document.
6) Page Borders
Page Borders adds a touch of neatness and class to your report. That being said, here’s how you can use a variety of border style offered in MS Word.
Step 1: You need to click on the Design Tab –> Click on the Page Borders options under Page Background group –> A Borders and Shading dialogue box will appear.

Step 2: Click on the Page Border Tab to view an array of border styles.

Step 3: You can use the four buttons placed under Preview window to apply or remove the borders –> on finalizing you can opt for applying it to the whole document or on the other preferred choices under the Apply to dropdown.
7) Insert Citation
In order to insert Citation, you need to select the appropriate style in which you intend to format the list of references.To select a particular publishing style you need to:
Step 1: You need to click on the Reference Tab –> click on the Style –> a drop down box appears
Step 2: You can select the required publishing style from the drop down list
Step 3: Clicking on the Reference Tab –>thereafter click on Insert Citation under the Citation & Bibliography group
Step 4: If it is a new source, click on the Add New Source option
Step 5: A Create Source dialogue box will appear –> you are required to fill in the required details like Type of source book, journal, article, report etc.
Step 6: Click OK once done.
8) Add Placeholders:
There are times when the information is relevant but there is no accurate information about the source and other related information. In such cases, you can insert the name of the source under the Placeholder option.
Step 1: Click on the References Tab –> Click on Insert Citation Option under the Citation & Bibliography group.
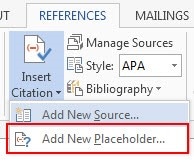

Step 2: Click on the dropdown arrow –> Select the Add New Placeholder option –> A Placeholder Name dialogue will appear–>Paste the source and click OK.
9) Manage Sources:
On using quite a number of citation the list of reference or sources can at times get a lengthy and could make it a little challenging for you to search a cited source. Here’s where Mange Source comes handy.
Step 1: To access the Manage Source, click on the Reference Tab –>click on Manage Source Option under the Citations & Bibliography group.
Step 2: A source manager dialog box will appear wherein, you can view all the citations under Master List including those that do not contain the entire citation details. Whereas, the sources of the citation appear under the current list column.

If you want to find a specific source in the source manager then;
Step a: You can sort the source on the basis of the Author, Tag, Title or Year. These options can help you to narrow down your search for the source you’re looking for.

10) Insert Footnotes & Endnote:
Like many of you I too was confused between a Footnote and Endnote feature in MS Word. However, with due course of time I finally can figure out the difference between the two. Basically a reference placed at the bottom of the page is all called the Footnote. Whereas, the references placed at the end of the entire document is called Endnotes. To insert a footnote or an Endnote here’s what you need to do.
Step 1: Firstly, click on the Reference Tab –> Depending on your requirements you can click on either Next Footnote or Insert Endnote option under Footnotes group.

By default MS Word places the footnote at the end of the page and Endnote at the bottom of the document. So, if you wish to format and makes changes in the footnote or endnote, you need to
Step a: Click on the Footnotes dialogue box launcher –> A Footnote and Endnote dialogue box will appear.
You can select the location you wish to change for instance, you wish to change the Endnotes custom mark, all you need to do is;
Step b: Select the Endnotes option under location
Step c: You can click on the symbol option –>a symbol dialogue box will appear
Step d: Select the symbol you wish to add and click on OK.
Step e: The selected symbol will automatically appear in the custom mark box –> Click on Insert to apply this symbol to your Endnote.
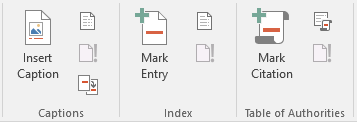
11) Table of Figures:
As the name suggest the Table of figures represent all the graphics, chart, maps and other illustrations. However, it is important to note that you need to first caption the illustrations present in the document. To do so you need to;
Step 1: Go on the Reference Tab –>Click on Insert Caption Option under the Captions group
Step 2: A Caption dialogue box will appear –> select the appropriate label type for the dropdown list for the illustrations –> Select the suitable positioning of the figure as well by clicking on the Position drop down list.

Step 3: After inserting caption for all the illustrations, click on the Reference Tab –>Click on the Insert Table of Figures option under the Caption group.
Step 4: The Table of Figures dialog box will appear –> Click on the Table of Figures Tab within.
Step 5: You will manage to get a preview of the content in print as well as the Web format under ‘Print Preview’ & ‘Web Preview’ option.
Step 6: Similar to the Table of Contents you can easily modify the Table of Figures by clicking on the Modify option –> A Style dialog box will appear –>According to your preference, you can make the necessary changes under this dialog box.
12) Create an Index
Index is similar to the Table of Contents; the only thing that makes them different is the detailed sequence. An index generally consists of the keywords along with the page number. This makes it easy for the reader to access the information they wish to refer. If you wish to add an index to your report you need to:
Step 1: Select the word or text you want to include in the Index.
Step 2: Click on Reference –>Select the Mark Entry Option under Index group –> A Mark Entry Dialog box will appear.

Step 3: The selected text will appear under the Main Entry box (if required, you can edit the appeared text). The Subentry option is usually used to justify the Main entry text.
Step 4: Click on the Mark button to include the text only in the Index. If you wish to show this text up everywhere in the document select the Mark All Option.
13) Bibliography
Bibliography is the most challenging part of a project report. However, a project report is incomplete without a bibliography. But to frame a bibliography you need to have all the citations in order. Assuming that the citations are already in place, we can now proceed to draft the bibliography
Step 1: You need to click on the References Tab –> you will find the Bibliography option under Citations & Bibliography group.

Step 2: A drop down will appear on clicking on the Bibliography option–>You will come across three built-in options –> i) Bibliography, ii)References and iii)Work Cited –>Select the type you think is appropriate for your project report.
These are some of common features in MS Word that could help you prepare a great project report. So, switch on your laptops or desktops and try using these smart and simple tips to draft your college project report. However, once you are done with the project report ensure to save the document and proofread it to not only find errors but also to understand and gauge if the document is reader-friendly and is in sync.
Share your thoughts with us on how did you find this article and if you liked it then do share it across with your college buddies and friends. Also, let us know if you would like us to cover similar articles with you. Till then, best of luck with those reports mates!
collegeDrafting TipsFormatMS WordProject Writingreliance digitalReport WritingResource Centre