
Microsoft Word or MS Word or rather widely known as Word is one of the most popular Microsoft software used by many including you. Although used extensively, not many are aware of the different hidden applications in MS Word. No, I am not talking about just using shortcuts to cut, copy or past but beyond that.
Without much delay, let’s jump into knowing some interesting and effective tips and tricks that will make you much well versed with Microsoft Word.
Insert Screenshot
While drafting an article or a write up at times,pictorial representation or reference adds more depth to the content. that being said, here’s you can take the help of the screenshot feature in MS Word. All you have to do is:

Format text
If I may ask, how you do format the text in word what would be your reply? Wait, let me take a guess… probably select the text and then click on the clear all formatting option right? Well, although that is one of the right way to format it is not the ‘only way’ you can easily clear all the formatting by just clicking Ctrl+Spacebar and get the text without any kind of styling.
Side –by –Side View
If you are working on multiple documents simultaneously view side by side is a go to option for you as it helps you to view two different documents at the same time. However, you can edit only one document at one time. So, the next time when you wish to work on two different documents consecutively all you need to do is:
 The two word documents will automatically get resized and fit into one window next to each other. Once done, you can close either of the document to disable the View Side-by-Side feature.
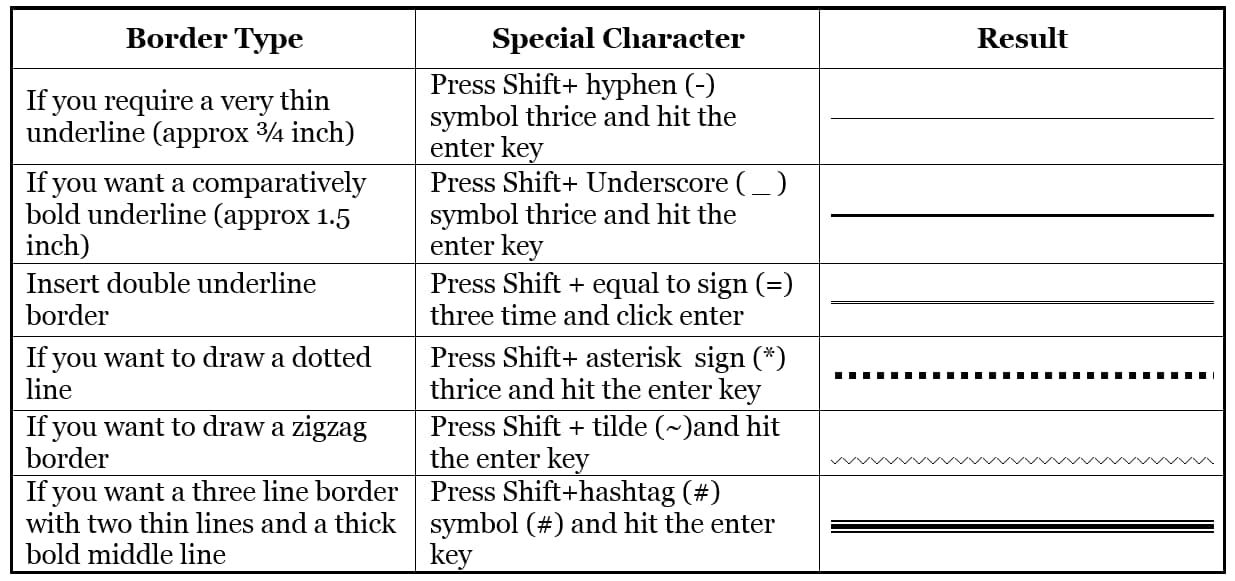
Add Border at the Bottom of Your Document
People who use MS Word extensively will certainly agree that boarders are truly powerful elements that can change the entire look and feel of the word document. That being said, not many yet know the trick of inserting a boarder on the bottom of the page. If you wish you to add a boarder at the bottom of your text or document you can simply use certain special characters and then press enter:
Cut the text without Cut-Paste Method
Is there another way to cut the text and paste it without actually using the Ctrl+X and Ctrl+V shortcut? Surprisingly yes and that too with just one key! Here’s how
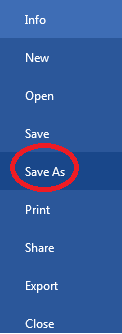
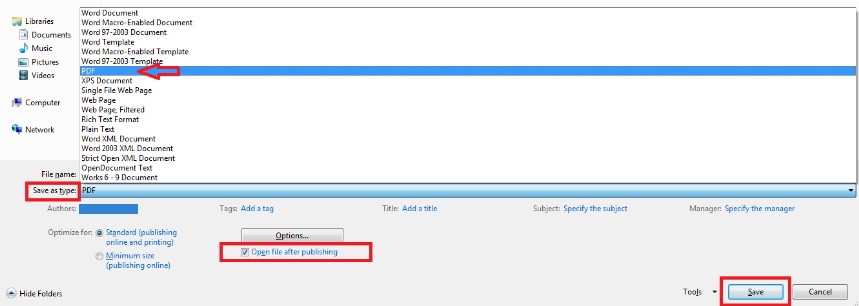
Convert Word into PDF
Are you still using the old school method of using third party software to convert your word doc into PDF format? Well, you can certainly ditch the old ways because now you can easily convert your word doc into a PDF in just few steps:
Pin a Folder or a File
For those who know this feature will surely agree that pinning a file or a folder saves a lot of time at work. As it allows you to conveniently access the required file or folder in no time. If from hereon you feel the need to pin your doc here’s how you can do in two easy ways.
 Step 1
 Step 2
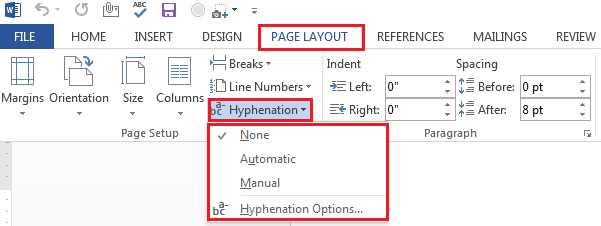
Control Word Break with Hyphenation
Have you noticed the words breaking into separate lines like; Therefore looks something like; There-fore or like-wise or en-try? I am sure you must have at some point, well this happens due to hyphenation. When a word does not entirely fit into a single line hyphenation automatically breaks or splits the word in smaller segments. To enable or disable hyphenation you need to first;
Safeguard Your Documents
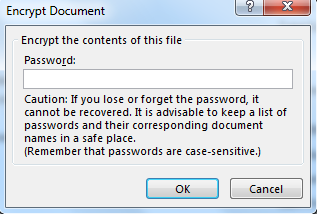
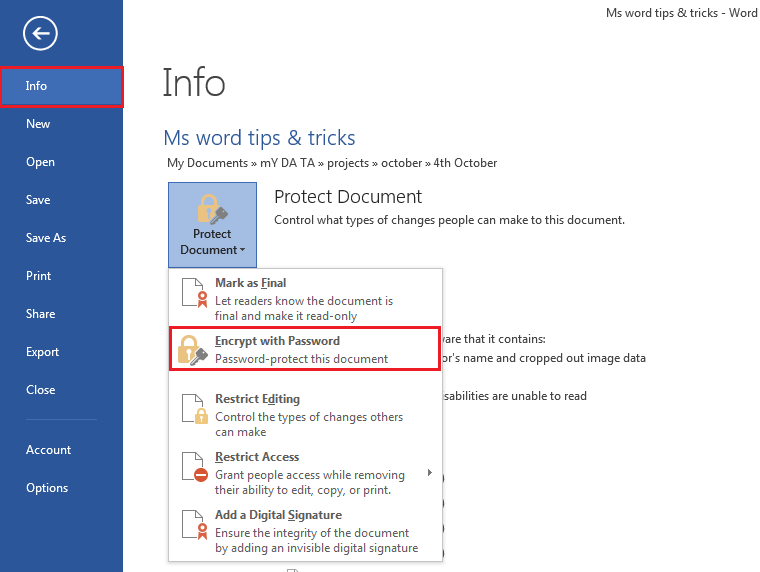
Although there are merits of encrypting the word document with a password. However, if you fail to enter the correct password you may end up losing the file completely.
Columns
The Microsoft Word Column tool is apt for those who love creating or designing brochures or want to give a different feel and look to the article. If you too are working on a similar documentation the column tool could help in enhancing your documentation as well for which you need to follow these simple step
Apart the above mentioned tips and tricks here are some quick keyboard shortcuts that could help you to work smarter with MS Word.

Whether you are a student, business professional or a writer or whether you use a desktop or laptop, you can certainly get some serious writing work done with the help of MS Word. However, that’s only if you know the tips and tricks of using the software. So, the next time you use MS Word with these simple tips & tricks you will become a pro at using this software.
Also check out some interesting keyboard shortcuts that will help you tackle your routine work seamlessly. If you found the article interesting then do share it with your family and friends as well.


